Clutch Cable Adjustment
SAFETY FIRST: Protective gloves and eyewear are recommended at this point.
Clutch cable adjustment should be checked before each ride. The clutch cable must be adjusted whenever the clutch cable free play is not within specification.
(Clutch Cable Free Play: 10 - 15 mm or 0.4 - 0.6 in)
Inspection

Free play is measured from the end of the clutch lever to the end of the grip. Measure the free play while gently pulling on the clutch lever until resistance is felt and compare your reading with specification.
(Clutch Lever Free Play: 10 - 15 mm or 0.4 - 0.6 in)


Pull back the rubber cover over the clutch cable adjuster.
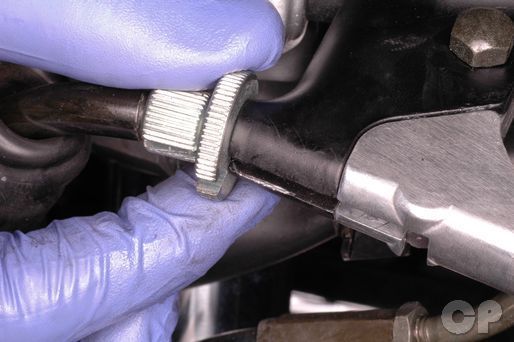
To adjust the clutch cable free play, loosen the knurled lock nut and turn the cable adjuster all the way in.
Remove the upper fairings. See the Upper Fairings topic for more information.


Pull up the rubber clutch cable adjuster cover on the left side of the engine.


Loosen the locknut with a 12 mm wrench and turn the adjuster with a 10 mm wrench to add free play to the clutch lever if needed.
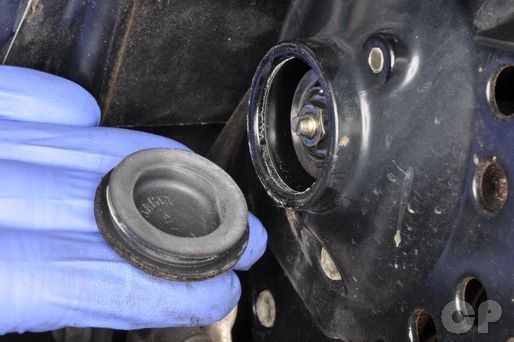
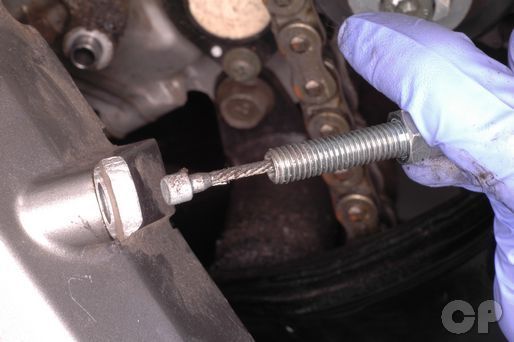
Remove the clutch release cap from the left side of the engine.


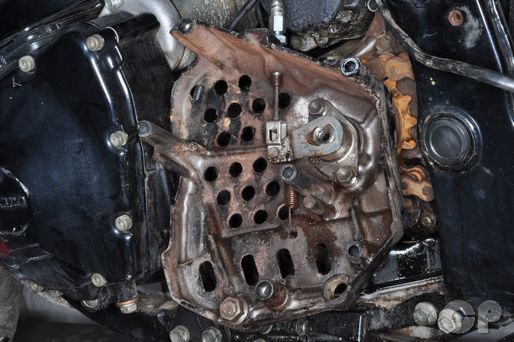
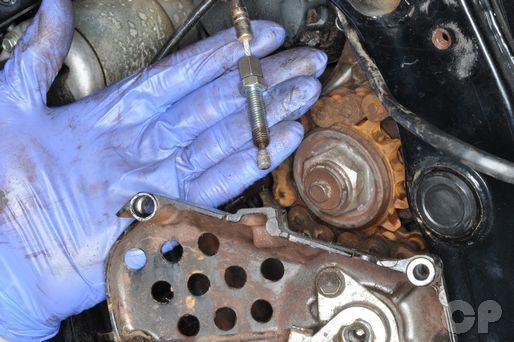
Loosen the locknut with a 10 mm wrench. We used a valve adjustment tool. Turn the adjusting screw two or three complete turns out with a flat blade screw driver. Turn the adjuster screw back in until you feel resistance. Turn the adjuster screw in a back out 1/4 turn. Hold the adjuster screw in place to prevent it from moving and tighten the locknut securely. Install the clutch release cap.
Install the clutch release cap into place.
Use the lower clutch cable adjuster to bring the clutch lever free play close to specification. Tighten the locknut securely with a 12 mm socket.
Bring the clutch lever free play precisely into specification with the adjuster at the lever. Tighten the knurled locknut securely.
If clutch cable free play cannot be adjusted within specification either the clutch cable has stretched and needs to be replaced or the clutch must be removed and inspected. See the Clutch topic for more information.


Return the rubber covers over the clutch cable adjusters.
Clutch Cable Removal
Slide off the rubber clutch cable adjuster cover.


Loosen the knurled locknut and turn the adjuster in as far as it will go while aligning the slot in the adjuster and lock nut with the slot in the clutch lever perch. Pull in the clutch lever with one hand while pulling on the clutch cable with the other. Quickly release the lever and pull the cable out of the adjuster and remove it from the lever.


Guide the clutch cable down through the frame
Remove the countershaft sprocket cover. See the Countershaft Sprocket topic for more information.


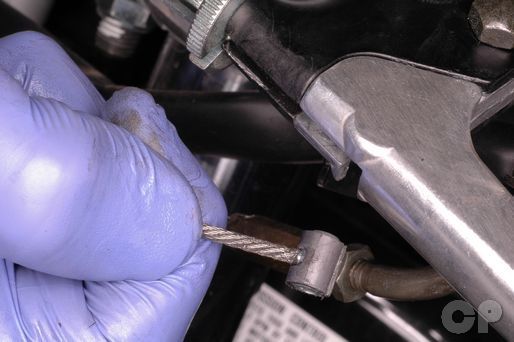
Unhook the clutch cable from the arm.
Remove the clutch cable from the countershaft sprocket cover.
Clutch Cable Installation
Guide the clutch cable into the countershaft sprocket cover.

Fit the clutch cable into the release arm.
Apply Suzuki Super Grease to the clutch release mechanism.
Suzuki Super Grease- 99000-25030
Install the countershaft sprocket cover. See the Countershaft Sprocket topic for more information.
Route the clutch cable over the engine, through the frame, between the front forks, and up to its lever.

Insert the end of the clutch cable into the lever and guide the cable through the slot in the perch, locknut and adjuster. Pull the clutch cable in and pop the cable housing into the adjuster.
Adjust the clutch cable free play. See Above for more information.
Copyright - Cyclepedia Press LLC

Note: If you are viewing this document offline be sure to visit the latest version online at http://www.cyclepedia.com before attempting any repairs. Updates are made without notice.