Lights and Fuses
SAFETY FIRST: Protective gloves and eyewear are recommended at this point.
Do not touch the light bulbs with your bare hand. The oils on your hand can cause the failure of the bulb when it gets hot. Clean the bulb with a lint free towel and alcohol if you touch it bare handed.
Fuses
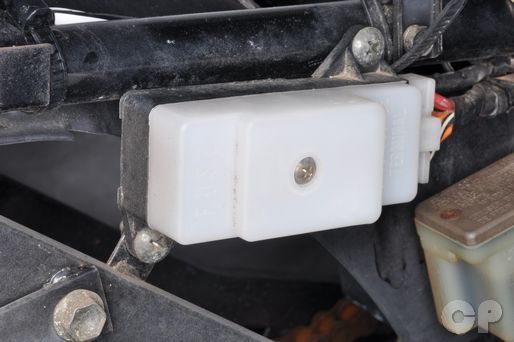
If a light is not working check the fuses. Remove the seat to get to the fuse box. See the Seat topic for more information.


Remove the fuse box cover screw with a #2 Phillips screwdriver.


Remove the fuse box cover and replace any blown fuses as necessary.
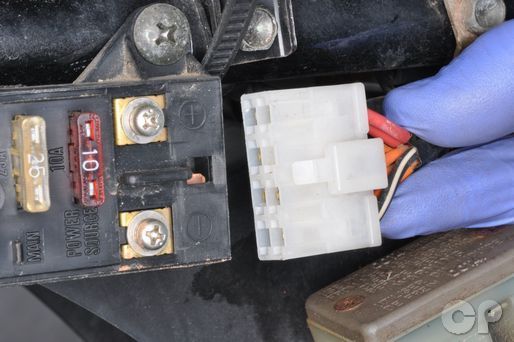


Remove the two fuse box screws with a #2 Phillips screwdriver.
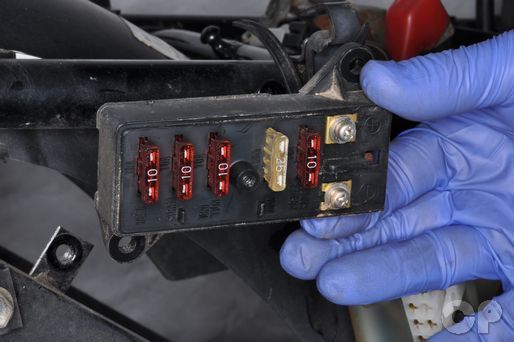
Remove the fuse box.
Removal
Taillight
Remove the Tail Section. See the Tail Section topic for more information.
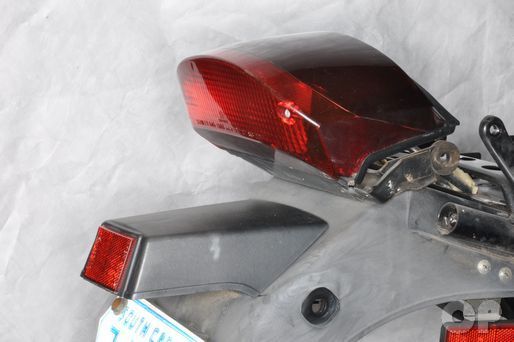


Remove the two taillight screws with a #2 Phillips screwdriver.
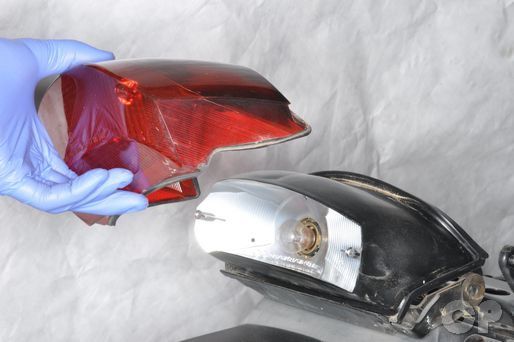
Remove the taillight lens.


Remove the taillight bulb.
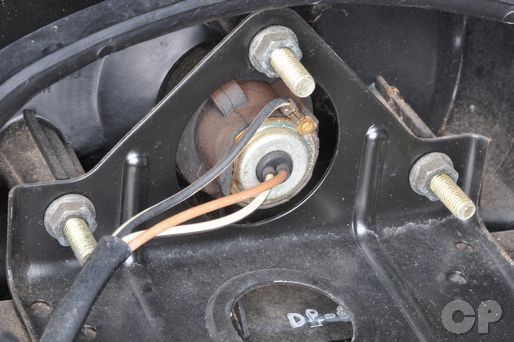


Remove the taillight housing bolts with a 10 mm deep well socket.


Disconnect the taillight connector.
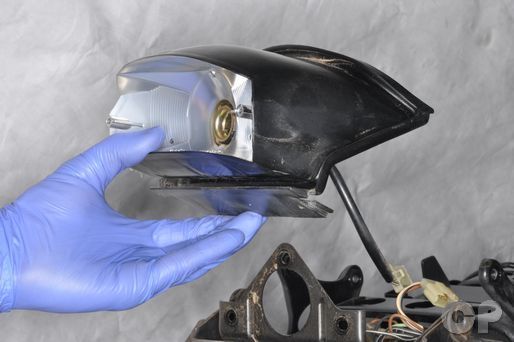
Remove the taillight housing.
License Light


Disconnect the two license light connectors.


Unbend the wire clamp from the license light wires.


Remove the wire clamp/license light cover screw with a #2 Phillips screwdriver.

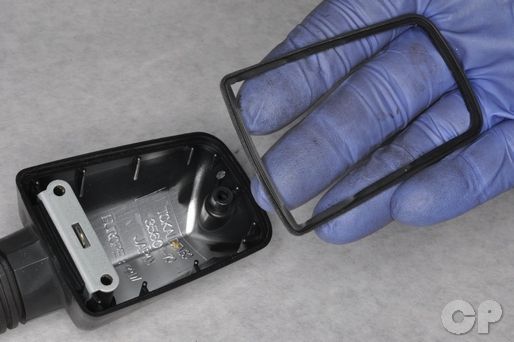
Remove the license light cover.


Hold the license light bracket bolt with a 10 mm socket. Loosen the license light bracket nut with a 10 mm socket. Check the grommets and replace if necessary.
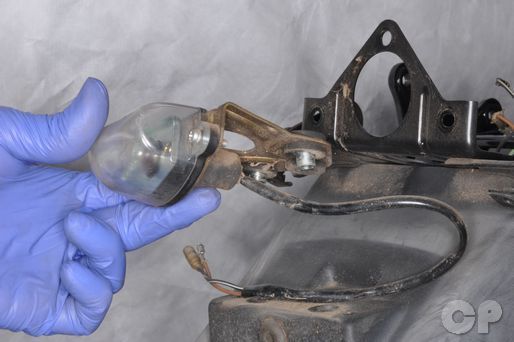
Remove the license light assembly.


Remove the two license light lens screws and washers with a #2 Phillips screwdriver.


Remove the license light lens and the bulb.
Installation
License Light
Install the license light lens and the bulb.
Install the two license light lens screws and washers with a #2 Phillips screwdriver.


Install the license light assembly and wires.
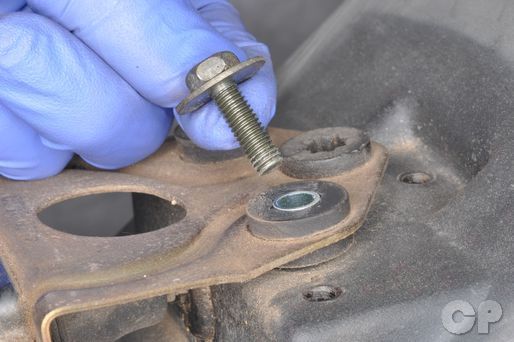
Install the license light bracket. Install grommets, spacers, bolts and washers. Thread the nuts onto the two bolts underneath.
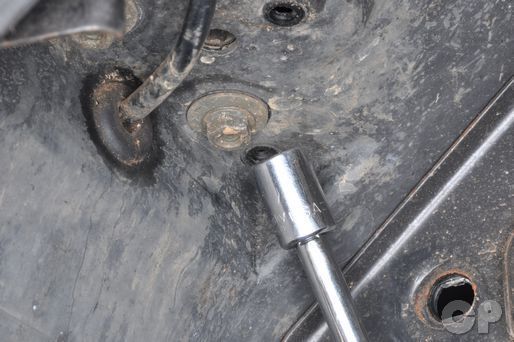
Hold the license light bracket bolt with a 10 mm socket. Tighten the license light bracket nut with a 10 mm socket.
Install the license light cover.
Install the wire clamp/license light cover screw with a #2 Phillips screwdriver.
Bend the wire clamp over the license light wires.
Connect the two license light connectors.
Front and Rear Turn Signals
Bulb Replacement


Remove the two turn signal lens screws with a small Phillips screwdriver.

Remove the turn signal lens.


Unscrew the turn signal bulb from the housing and replace it with a new item.
Remove and inspect the rubber turn signal lens grommet. Replace if needed.
Install the two turn signal lens screws and tighten them securely with a small Phillips screwdriver.
Install the turn signal lens.
Install the two turn signal lens screws with a small Phillips screwdriver.
Front Turn Signals
Removal
Remove the upper fairings. See the Upper Fairings topic for more information.
Disconnect the two front turn signal wires. Loosen the front turn signal mounting nuts with a wrench. Remove the mounting nut and the turn signal.
Installation
Install the front turn signal. Slide the mounting nut over the turn signal wires and thread onto the turn signal. Tighten the nut with a wrench. Do not over tighten the nut or you will crack the fairing. Connect the two front turn signal wires.
Install the upper fairings. See the Upper Fairings topic for more information.
Rear Turn Signals
Removal
Disconnect the two rear turn signal wires. Loosen the rear turn signal mounting nuts with a wrench. Remove the mounting nut, grommet and the turn signal.
Installation
Install the rear turn signal. Slide the mounting nut and grommet over the turn signal wires. Thread the nut onto the turn signal. Tighten the nut with a wrench. Connect the two rear turn signal wires.
NOTE: This vehicle is equipped with a turn signal relay.
Copyright - Cyclepedia Press LLC

Note: If you are viewing this document offline be sure to visit the latest version online at http://www.cyclepedia.com before attempting any repairs. Updates are made without notice.