Out on the road, larger displacement scooters provide riders with spacious seating, ample storage capacity, excellent gas mileage and the ease of an automatic transmission. Gliding down the highway, or running around town on a bike like the Suzuki Burgman is a breeze. However, all of the simplicity of big scooter travel requires a foundation of technological wizardry. When a big scooter finds its way into a service shop, any tech can tell you a few horror stories about dealing with what is sometimes referred to as “the rat’s nest of scooterism”. Big scooters like Suzuki’s AN650 Burgman are complex machines that require a host of specialized tools to service. However, while a scooter might seem very alien and daunting at first, a good quality service manual and some patience will reveal to the technician that scooters share a great deal of mechanical parts and design features with the other motorcycles and ATV’s commonly serviced. Unfortunately, the shop manuals provided with these machines are not always entirely complete or accurate. At Cyclepedia, we strive to pick up the slack left by your typical service manual and create a product that not only covers the basics, but also provides model specific tips and tricks to expedite service procedures.
One such tip can be found in our Suzuki AN650 Burgman manual, and this tip could save your shop technicians a good deal of time, which in turn saves money. The Suzuki Burgman is equipped with what Suzuki modestly terms, the Suzuki Electronically Controlled Continuously Variable Transmission (SEVCT™). This is a fairly complex piece of transmission technology that sometimes requires a teardown in order to inspect clearances or simply to service wearable parts. Actually disassembling a piece of machinery like this is complicated enough, but when you can’t remove the SEVCT™ from the rest of the scooter the whole service process grinds to an expensive halt. The SEVCT™ is attached to the engine with a series of bolts, including one bolt that we at Cyclepedia have termed, ‘the mystery bolt’. During our SEVCT™ removal procedure we found that the manual we used as a guide did not instruct us to remove the ‘mystery bolt’ and failed to adequately describe the function of bolt, opting instead to simply provide a caption that read “bolt”. Because of that lack of information, our technician had to spend 30 minutes trying to figure out why the SEVCT™ was not detaching from the engine even after removing all of the bolts the manual had instructed to remove. Here are the steps we recorded for removing the SEVCT™ from the Suzuki Burgman engine, including finding and removing the confounding ‘mystery bolt’.
First and foremost, the engine must be removed from the Burgman. If you haven’t done this or don’t know how, it is recommended that you take a look at the Cyclepedia Suzuki Burgman AN650 manual, which can be found on our websitewww.cyclepedia.com.
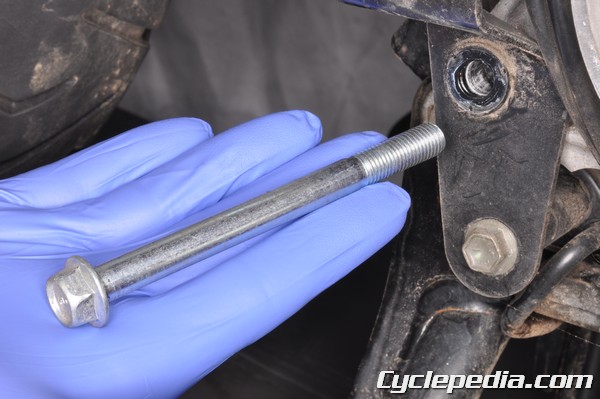
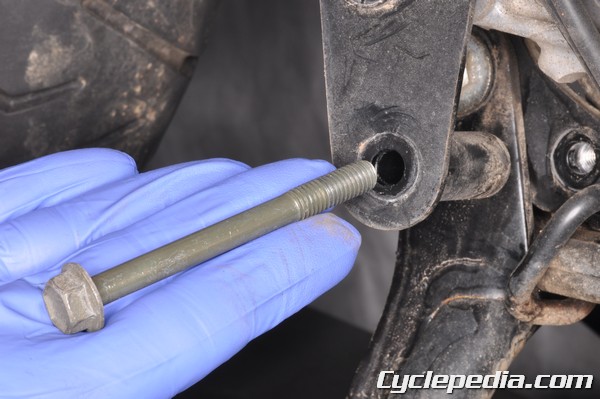
Remove the upper bracket bolt with a 14 mm socket. Remove the lower bracket bolt with a 12 mm socket.
Remove the bracket from the right side of the engine.
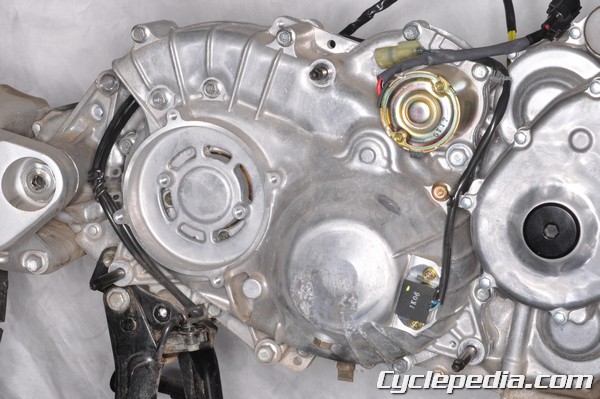
Remove the three SEVCT™ mounting bolts. Remove the one upper SEVCT™ bolt with a 14 mm socket. Remove the two lower SEVCT™ bolts with a 14 mm socket.
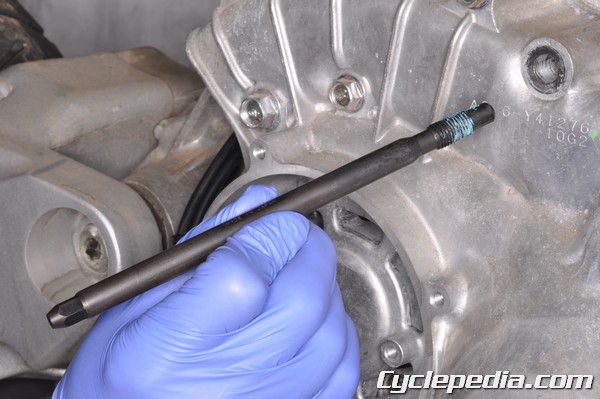
Coat the SEVCT™ guide threads in grease and install them in to the bolt holes as shown.
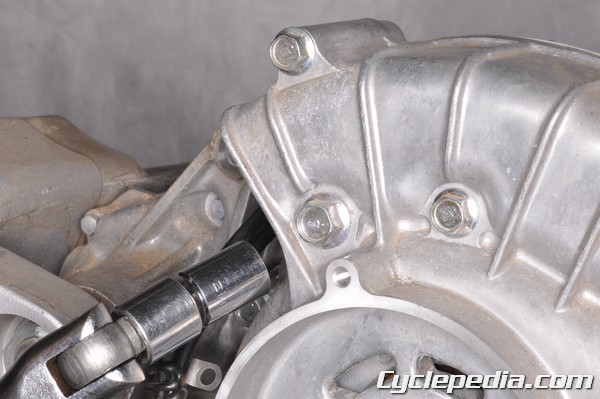
Remove another set of three SEVCT™ mounting bolts with a 14 mm socket as shown.
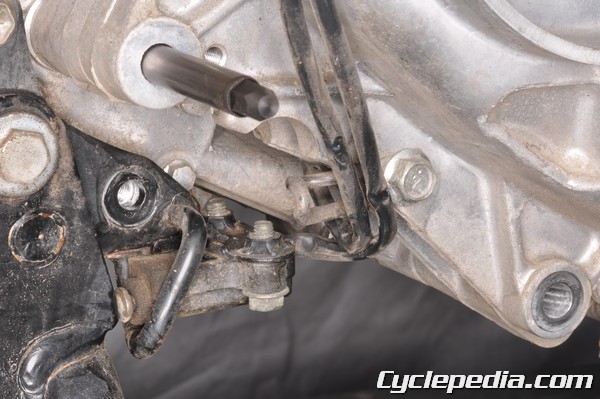
Open the wire stay on the bottom of the SEVCT™.
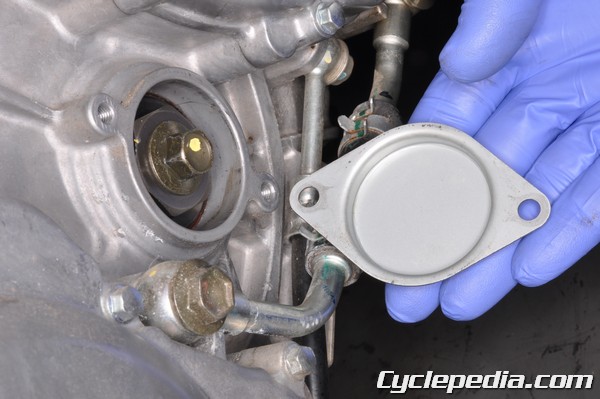
On the 2005 and newer models, remove the two primary pulley shaft cover bolts with a 10 mm socket and take off the cover. It is under this cover that the mystery bolt resides.
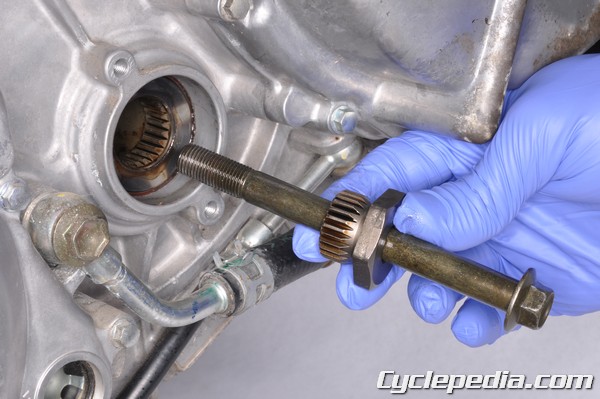
Use the primary pulley shaft bolt holder tool and loosen the primary pulley shaft bolt (a.k.a. mystery bolt) with a 14 mm socket. Discard the primary pulley shaft bolt in favor of a new item. In order to remove this mystery bolt you will have to have a special tool, namely the Primary Pulley Shaft Bolt Holder.
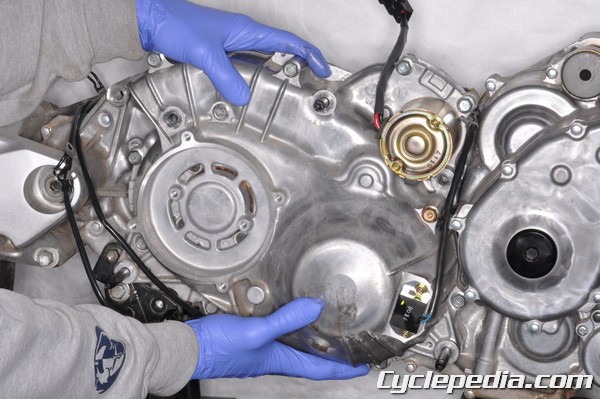
Move the SEVCT™ transmission to the right and remove it from the engine. Guide the transmission shafts out of the engine.
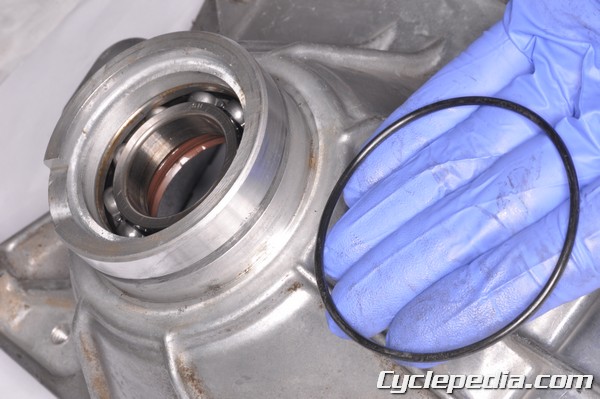
Remove the O-ring from the CVT housing and replace it with a new item on installation.
Brought to you by the people at WWW.CYCLEPEDIA.COM, which provides full service manuals and flat rate labor times for professionals in the motorcycle service industry.


Leave a Reply
You must be logged in to post a comment.